Wednesday, July 29, 2015

Refinishing Our Kitchen Cabinets - Day 16

Okay, so I know that I said I was superstitious about doing the stripping of the cabinets, but I am less nervous about that and more nervous about not having these done in time for the new floors to be installed.  I know what you must be thinking, "how do drawers impact your floors?"

I'll tell you how.  Because without things on the floors, like a dining room table and a buffet, we aren't going to have places to keep all of our drawer stuff, and since everything that is currently on the floor will shortly be in the garage temporarily, that would mean we will very likely be eating in the garage if I don't get these things done, just so we can have access to the silverware.

Ok.  So, here goes.

 First things first.  You see that streak across the left lens of these safety goggles?  Yes?  THAT IS STRIPPER!  Now imagine what that would do to your EYE.  So, safety first.  Wear goggles.  (I don't remember when this happened, but I do remember that it is stripper . . . so I must have stripped something at some point.)

And some other tools.  Along with the actual stripper, a chip brush, and mineral spirits, these are my starting point.  So let's do this thing!

This is the drawer.

 The stripper is thick and pasty, but it does drip.  Having just gotten a streak of polyurethane on my leg that lasted as a brown reminder for a week, I wore my work jeans despite the heat.  (Polyurethane is sticky and doesn't wash off even with pumice once it sets, but stripper is stripper.  I like my skin where it is, thank you.)

These are two more of the drawers so you can see the process unfold on half the project.  (Not that the other half is secret, it was just on the other side of the garage.  I was willing to turn the tripod, but not move it.)


 Once the stripper set for a while (I coated them all and then just went back to the beginning) I scraped it off of of the flat faces with a scraper,

 brushed the harder to reach places with a stiff bristle angled brush,


 and cleaned the remainder with mineral spirits and a rough scraping pad.  (I should have used steel wool, SPF tells me now.  Which makes sense because the rough, green pad is now basically in tatters.)

Once these were all prepped as best as I can do them with the chemicals, I left them to dry and moved to the inside project.

THE CABINET FACE

 Oh, the short sightedness!  Oh, the lost opportunity!  Oh, the incredibly difficult job that lies ahead.

Blarg.

No use crying about things you can't go back and do right.  You can, however, do it right now.  So here is my tool set.  Yep.  Just the sanding block and 150 grit paper.

 Cut to size.

 And locked in place.  I got this.


I don't got this.  This set of images does not belie the amount of time, effort, muscle strain, and stiff knees that went into this moderate progress.  Alas, I am afraid to use stripper because of the stain on the left side of this cabinet and the paint on the right.  I am afraid to use a belt sander because I'm convinced I would go too deep, which I cannot recover from.  So, I think, over the next several days I will be sanding as much as I can, when I can.  And maybe I'll treat myself to a massage at the end of the week.  Or the end of next week.  Or the end of August.  You get my drift.

Labels: ,

Refinishing Our Kitchen Cabinets - Day 15

You know that old saying "Measure twice, cut once"?  Yeah . . .

So the thing about putting door handles on is that you not only need to measure to get the handles in the right spot, you need to be sure that the door handle is on the correct corner of the door.  So, measure all you like, but if you need to put the handle on the top right of the door, but you put it on the bottom right of the door, you are kind of up a creek without a paddle.

But not all is lost!  I know what you're thinking.  "HOW COULD YOU!?!!?  AFTER ALL THAT WORK?!?!?!?"  It's sort of a "can't see the forest for the trees" situation.

Whatevs.  The way I look at it, this is just another opportunity to learn something and ultimately improve the doors in the process.  So let's meet my co-stars.

Hello, wood filler.  So, the only thing that really happened is that the doors now have some extra holes.  Sort of like a wood vampire got into the house and attacked the door.  (How would you kill a wood vampire?  A person stake?)  So, we need to fill the holes.  To do this, a little bit of dowel to bridge the gap and some stainable wood filler to finish it off.

This is one of my favorite things.  It is a stain pen.  You use it in small places where there is just a little exposed wood that needs to be stained.  (Like when I left that cotton ball on the coffee table that had nail polish remover on it . . . yeah.)  It kind of looks like a highlighter when you use it.  But it is so convenient and very helpful.

 See?  Wood vampire.  Okay, so the dowel is in and the wood filler applied. 

Once they dried, I sanded the surface to remove the excess wood filler (around the edge) and prep the wood surface as much as possible.

 Handy, dandy tack cloth to take off the additional dust before the application of the new stain.

The same as standard staining, I covered the whole area with the pen and let it sit for a minute before I wiped it off with a clean cloth.  This is because I want to be sure that I blend in the stain to match the stained door underneath.

 Use the pen again to hit the vampire holes because they have more depth than the rest of the wood filler that is resting on top of the door.  I did this a couple of times to get a nice, rich color on the wood filler.  Since it isn't the same wood, it doesn't take the stain in the same way, so this is a matter of trial and error.

I will do a couple more passes, but I think it actually looks fine.  I faked the grain lines over where the wood filler was still on the surrounding door area and will do this same thing to the back (the holes go all the way through.)  No worries, though, I bet when it's all said and done, you wouldn't be able to tell that anything had gone wrong.  Life's messy.  We just need to learn how to clean it up.

Besides, alls well that ends well, right?  The doors are going to look like this when they are done.  And I have been waiting for this for five years!  What's a little extra challenge after a five year project?  Fun, that's what.

But still, measure twice, cut once is a good rule of thumb.  Add to that "think about functionality" and you should be fine.

Labels: ,

Thursday, July 23, 2015

Refinishing Our Kitchen Cabinets - Day 14

So close!

The last four doors are stained and the polyurethane is applied and dry!  Now we just need to add the hardware, which involves drilling new holes for the handles and attaching the new hinges.  This is something that, after spending days and days with these doors, I cannot do.  It's like performing surgery on your own kid.  (Well, like a really really really mild version of that.  Like having to use the sharp tweezers to get out a splinter, but still.)

None-the-less, SPF will be doing that.  So I wait.  And the doors wait.  In my office.

But aren't they pretty?!!?

Now on to the next stage.  The final stage of the process.  The last vestiges of the Old Kitchen.  After this, everything in the kitchen will have been redone, from the ceiling to the floors.  All new appliances, new sink and counter tops, a back splash (not a new one, because there wasn't one before), and refinished doors and drawers.  (Plus painted interior cabinets, FYI.  Swanky.)

But we can't say everything until we finish the drawers and the weird pull out cutting board integrated into the cabinet face.  (Which my mom loves.  Love you, Mom!)

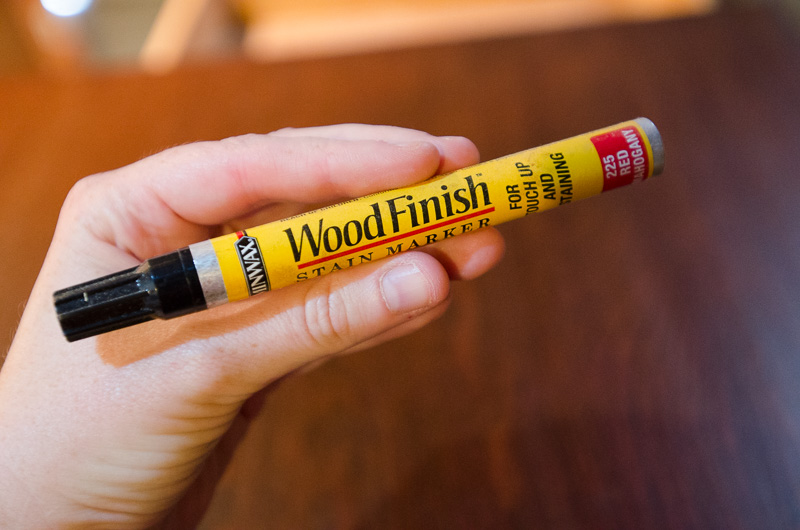
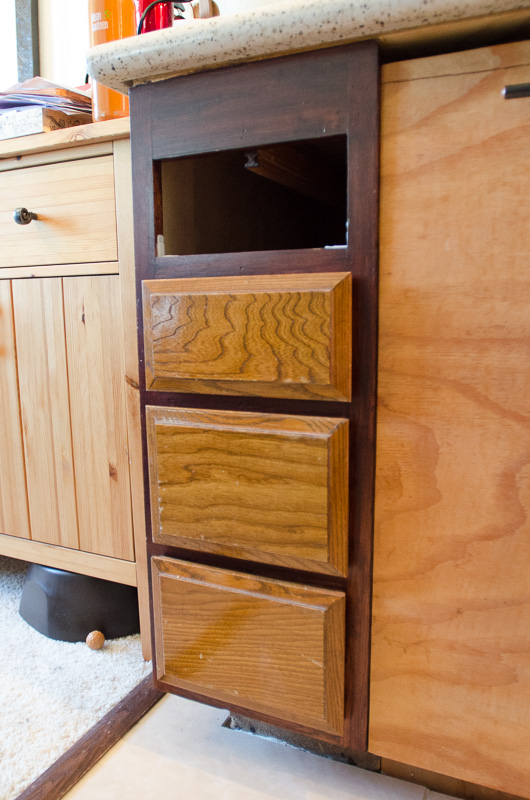
Here are the drawers in context.  The golden oak look is the old look, the red mahogany of the cabinet face is the new look.  And I just realized that the "new" trash and recycling pull out will also need to be finished in some way.  DRAGNET!

 I realize this image isn't that much different from the last one, but it makes me so happy!!!  When these drawers come back, they are going to be so beautiful!  Look at that rich, red mahogany!

And here are the drawers, staged and ready for SPF to do the stripping.  When we started this process, SPF did all of the stripping and I did all of the refinishing.  I know it sounds superstitious, but I'm afraid that if I do the stripping on these, they won't look exactly the same.  You know, like how wearing the same pair of socks for the whole season makes the QB better or something, right?  I don't think that's super crazy.  (I do think, however, that the fan in another city that does the same thing is a complete nutter.)

Hmmmm.  Notice anything about those drawers?

Yeah, that's right, they're empty.

 So now all of our cutlery and silverware are on the buffet along with all potentially child damaging sharp things like cheese graters, apple slicers, cork screws, vegetable peelers, etc.

And on the dining room table is everything else.  A veritable plethora of unique new toys for two curious toddlers.  Those towels won't stay folded for more than 10 seconds when those boys get home, and there will be re-evaluations of the salad spoons, rolling pin, and meat tenderizer when they inevitably become swords, "pewers" (you know, like "I got you, pew, pew, pew!"), shields, or just fun things with which to hit your brother or a cat.

Yeah, that meat tenderizer in particular is looking like it should be filed on the buffet . . .

Labels: ,

New Wall - Day 4

Well, Day 4 turned out to be interesting.

Because it is easier to put up the drywall without the cut hole and use the framing of the new wall to find the edges once the board is up, the HVAC had to go on vacation for a little while.  In July.  And then we realized that the thermostat had actually been left on the original wall, which was now behind the new wall.  So the wall came down, the thermostat was removed, and the wall went back up.

Once that was done, SPF screwed the drywall in place, caulked the seams (this is, after all, an air intake, so we don't want lots of dust or weird wall stuff getting sucked into the HVAC), and taped up the intake with metal HVAC tape to make it clean and functional.

 We weren't sure if this was necessary, but it doesn't hurt, so we did it anyway.

 After disconnecting the thermostat wires and pulling them through the wall into the cabinet, we had a bit of bare wire to bare wire contact.  This lead to a strange clicking sound and a new personality to our HVAC.  New in that it is in a coma.  In July.  So we taped up the ends so that they wouldn't touch each other again and called the HVAC guy, who is supposed to be here today between 4:30 and 5:00.  Last night was thankfully not too warm, and our electric bill should be smaller for it, so silver lining.
The poor HVAC has an error code mechanism that blinks short blinks for the first digit and long blinks for the second digit (allowing for an alarming number of error codes.)  Anyway, it looked like the poor thing was trying to signal SOS.  But no, this was two short-four long, not three long-three short-three long.  So, at least it didn't think it was dying.

When it is fixed (turns out to be a shorted 24 volt fuse) it should look nice.  But we will need to paint and drywall around it as it has been passed back through the wall and connected to the dormant thermostat display.

The vent looks nice, though!  Sturdy and fixed nicely into the new wall.

Labels: ,

Wednesday, July 22, 2015

New Wall - Day 3

Well, working to complete the wall is proving difficult only because of time.  Because we run our own business and I work freelance as a writer, photographer, and educator, we are a little strapped for time, even during my summer break.  Considering that this project is entirely SPF's so far, I haven't been able to help out, though I am really trying to get lots of progress images to show all of you.  Don't worry, though, the next phase of other projects will soon be updated.  Projects that I did work on.

SPF is using both liquid nails and braces to keep the new frame in place and level.  The liquid nails by itself isn't as robust as we would have hoped, which is why there is now some liquid nails residue on the carpet.  I guess we better rip those out!

One of the many things I learned from the amazing Scott McGillivray (sigh) is that whenever you are laminating one thing to another with a liquid glue you should do an S pattern and not include any completed circles or completely entrapped areas.  This way, if there is expansion or contraction due to temperature or humidity changes, your glue won't be compromised.  So we glued this puppy with an S pattern.  (I have no idea if SPF knew that already, but I am going to imagine he did seeing as how I didn't communicate that to him and he didn't watch that much Scott McGillivray with me.)  So, YAY SPF!

The new interior frame will have the outer frame and then a new stud on the 16" mark between studs so that we can be at a standard distance for hanging the drywall.

The last little bit of frame is for the HVAC intake, which needs a sturdy frame to affix the air intake filter cover back to.  One trick is our thermostat, which is affixed to cabinet wall.  I hope it will move easily, but it does have some wiring, of course, that will need to be considered.  Hmmmmmm, considering . . .

Until next time!

Labels: ,

Tuesday, July 21, 2015

Signed, Sealed, and . . .

Soon to be delivered!  I just signed the paperwork for the new floors and the new stairs and banister.  WOAH!  Huge commitment, but SPF and I are extremely excited.  I cannot wait for this process to start and then end.  Hopefully very quickly.  Until then, I will start posting floor pictures so that you can see what we've been living with!  (These before and after's should be astounding.) 

:D


Monday, July 20, 2015

Refinishing our Kitchen Cabinets - Day 13

Okay, before you go asking what happened to days 7-12, let me remind you that this project is now five years old.  Soooo, there are probably even more days, but the update I gave you yesterday is actually what I am calling days 7-12.

But now for the update with lots of pictures!  I only have the four doors left, so I am working to get all of them done at once.  That is actually not a big deal at all, but I did most of the doors in small batches just for lack of space throughout the process.  I will try and do all of the drawers at once, though.  Partially because I think they won't take up too much space and partially because I don't want to wait another five years for the drawers to be done.  :)

 As mentioned before, I have a problem with the humidity, so I had to let these guys dry for 24 hours.  Because of that, I needed to do a light sanding between coats to be sure that the next coat would go on smooth and lay flat.  This also works to cut down any abnormalities in the finish, like any trapped air bubbles or areas of higher finish.  This is a light sanding, though, so as not to take off any of the stain underneath.

 After the sanding, I removed all of the excess dust with a tack cloth that left the surfaces of the doors nice and smooth, lightly sanded, and clean.

 I learned a trick from a book I have on woodworking, so I conditioned the china bristle brush in mineral spirits before I used it.  I have found in the past, though, that not getting the mineral spirits out of the brush leaves some unwanted streaks in the finish.  So I squeezed the bajolies out of the brush and then sharply flung the bristles towards the work sink to get any remaining mineral spirits off of the brush.  It is great to have the brush conditioned - the polyurethane goes on very nicely and the brush is easier to clean later - you just have to be sure that the brush is conditioned and not coated.

Another neat trick I learned is to start the finish in the middle and work to the edge.  This allows for the polyurethane to coat the top without running over the edges.  If  you go from edge to edge, you end up with poly seeping down one side, which then has to be cleaned up or you get poly "droplets" that dry in place on the other side of your doors.  (Remember, all of this information is learned from experience, so, yes, I have some permanent droplets that I have had to deal with in the past.)

 After the first pass, you start in the middle again and work in the opposite direction.  The coating should be smooth enough to even out over time - one of the benefits of using oil based poly - but I am always careful make sure I don't have a hill in the middle of the door where the two directions intersect.  The most difficult part is actually moving around the edges, making sure they are coated without having so much poly that they end up dripping long after you've taken your lunch break.

The current iteration!  This isn't how they will look at the end of the process, as I am using a satin finish (a semi-matt finish) but this is right after coating.  (Both doors have been coated, the one in focus and the one behind it.  Once they are finished, I will show you the doors actually on the cabinets.)

Labels: ,