New Stairs - Day 4
Day 4 was very similar to the end of Day 3 - mostly refurbishing the old staircase, prepping the stringers, and finishing the treads with some heavy duty lag bolts and angled ties. (I may not get all of the lingo here right, but you'll get the idea.)
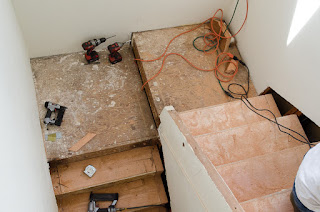
This is a mid process shot. You can see him working to cut out the stringer on the left, towards the riser, but the other two steps still have the stringer. It's a significant job, and a significant amount of space that we are getting to extend the stair width. It's very exciting!
You can see the cut out along the wall, and you can also see the existing stringer on the inside of the stairs. That puppy is notching out, too!
SEE!!!!!!!!!!
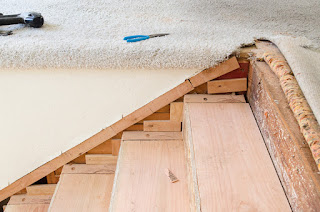
In order to have something to put the skirt against, they created this patchwork of spacers that are nailed into the wall to the side of the stairs to flesh out where there is no longer stringer or drywall.
Of course, not all of the walls have plywood next to them, so this is some creative woodwork to make the necessary framing. Obviously, none of this is structural. :)
The old "architectural detail" was just a piece of wood lining the stringer. I never really thought about how bizarre it was until now. I suppose it was something, though. At least the original builders were thinking about adding some detail? No matter how small and not really noticeable?
That little black dot is the head of one of those lag bolts I was telling you about. It seems simple enough, but it must be six inches long. All of which is designed to add even more support to the new stairs.. "It's not necessary," Travis tells me, "but I like to over-engineer to make sure it's solid."
I'll say! Not only are there super heavy duty brackets counter-sunk angled bolts the size of my ring finger, but now six inch lag bolts. Nice.
I admit when we were talking to the salesman for this job and he mentioned that he could "remove the rough cut stringer and replace the missing edge with a clean skirt and matching apron" I had no idea what he was talking about. This is just a picture of the lines that Travis drew that needed to be cut out of the MDF to make the skirt.
And this is the beautiful, incredibly clean, actually architectural details. Sooooooo pretty!
Looking up the first rake of the stairs. Beautiful skirt to the left, amazing notched stringer to the right.
This is a thing of beauty.
The apron, as it turns out, goes along all of the upper areas where there will be stair nosing to wrap around, matching the hardwood that we bought.
Labels: New Stairs, Remodel


0 Comments:
Post a Comment
<< Home